搭建环境
- 操作系统:windows 10
- 开发工具:vscode、Git
搭建思路
使用四个仓库,管理Blog,分别是:
- 源仓库:private,托管所有配置文件
- 发布仓库:public,托管Github pages内容仓库
- 主题仓库:public,托管当前使用的主题自定义内容
- 评论仓库:public,托管blog文章评论信息
使用Github Action:当源仓库有push时,自动生成静态页面到username.github.io域名下
安装 hugo
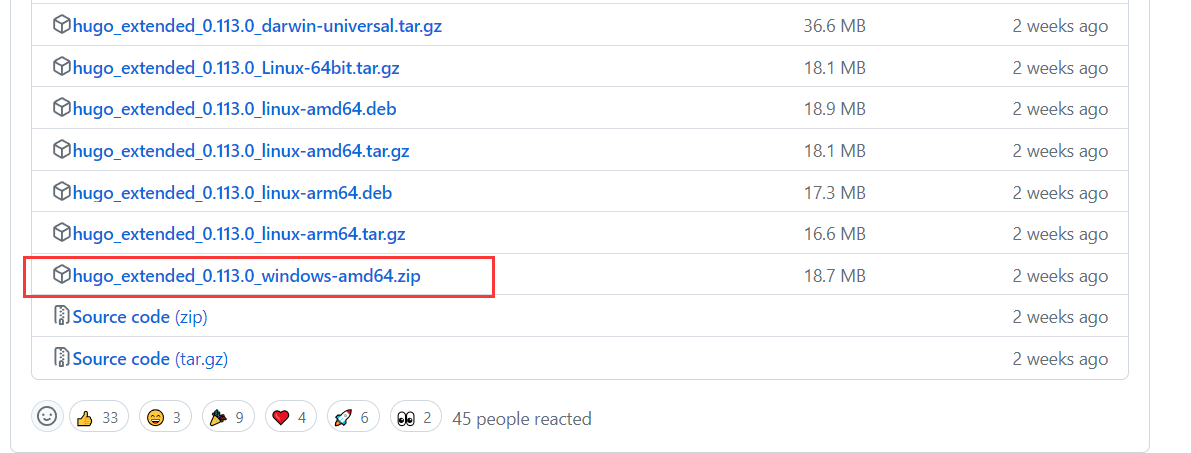
由于Stack要求SCSS 和 TypeScript,所以需要下载extend版本:Releases · gohugoio/hugo · GitHub
Stack要求hugo最低版本 → theme’s theme.toml file
安装完成后,重启terminal,check version:
新建 site
选择 or 新建一个文件夹,用于管理自己的blog,作者使用的是D:\code\blog新建site,拉取stack作为module:
hugo new site hugostack
cd hugostack
git init
git submodule add https://github.com/CaiJimmy/hugo-theme-stack/ themes/hugo-theme-stack
将themes/hugo-theme-stack/exampleSite子目录下的文件拷贝到根目录下:
cp -r themes/hugo-theme-stack/exampleSite/* ./
# 删除根目录下默认的配置文件,不同hugo版本各有不同:hugo.toml/config.yaml
rm hugo.toml
尝试本地运行
hugo server -D
bug 1:languages.en.description: custom params on the language top level is deprecated and will be removed in a future release.
WARN 2023/06/23 10:15:21 config: languages.en.description: custom params on the language top level is deprecated and will be removed in a future release. Put the value below [languages.en.params]. See https://gohugo.io/content-management/multilingual/#changes-in-hugo-01120

Re-run Hugo with the flag --panicOnWarning to get a better error message.
WARN 2023/06/23 10:15:21 config: languages.zh-cn.description: custom params on the language top level is deprecated and will be removed in a future release. Put the value below [languages.zh-cn.params]. See https://gohugo.io/content-management/multilingual/#changes-in-hugo-01120

Re-run Hugo with the flag --panicOnWarning to get a better error message.
WARN 2023/06/23 10:15:21 config: languages.ar.description: custom params on the language top level is deprecated and will be removed in a future release. Put th
Re-run Hugo with the flag --panicOnWarning to get a better error message.

解决:大致含义是新的hugo版本会逐渐舍弃自定义language参数,所以将config.yaml中的language中的title和description字段,以及语言ar去掉:
languages:
    en:
        languageName: English
        weight: 1
    zh-cn:
        languageName: 中文
        weight: 2
bug 2:error calling partial: partial “article/article.html” timed out after 30s. This is most likely due to infinite recursion. If this is just a slow template, you can try to increase the ’timeout’ config setting.
ERROR 2023/06/23 10:46:27 render of "home" failed: "D:\code\blog\hugostack\themes\hugo-theme-stack\layouts\index.html:9:15": execute of template failed: template: index.html:9:15: executing "main" at <partial "article-li15: executing "main" at <partial "article-list/default" .>: error calling partial: "D:\code\blog\hugostack\themes\hugo-theme-stack\layouts\partials\article-list\default.html:3:rtials/article-list/default.html:3:7: execut7": execute of template failed: template: partials/article-list/default.html:3:7: executing "partials/article-list/default.html" at <partial "article/components/header" .>: erricle\components\header.html:34:7": execute oor calling partial: "D:\code\blog\hugostack\themes\hugo-theme-stack\layouts\partials\article\components\header.html:34:7": execute of template failed: template: partials/articl.RelPermalink>: error calling partialCached:e/components/header.html:34:7: executing "partials/article/components/header.html" at <partialCached "article/components/details" . .RelPermalink>: error calling partialCached: config setting. partial "article/components/details" timed out after 30s. This is most likely due to infinite recursion. If this is just a slow template, you can try to increase the 'timeout' config setting.                                                                                                                                                                 of template failed: template: _default/sing
Built in 30147 ms                                                                                                                                                               nite recursion. If this is just a slow templ
Error: error building site: render: failed to render pages: render of "page" failed: "D:\code\blog\hugostack\themes\hugo-theme-stack\layouts\_default\single.html:27:7": execute of template failed: template: _default/single.html:27:7: executing "main" at <partial "article/article.html" .>: error calling partial: partial "article/article.html" timed out after 30s. This is most likely due to infinite recursion. If this is just a slow template, you can try to increase the 'timeout' config setting.
解决:
首先,科学上网
其次,在根目录的config.yaml中添加timeout字段,默认是30s,增大到10m:
# large timeout
timeout : "10m"
success!

关联仓库
本地已有源仓库和主题仓库,需要将其关联到远程:
远程源仓库:新建一个,设置属性为private,如:/username/hugostack.git
远程主题仓库:fork之前submodule的主题仓库到自己的github
# 关联到远程
git remote add origin https://github.com/username/hugostack.git
cd themes/hugo-theme-stack/
git remote set-url origin https://github.com/username/hugo-theme-stack.git
测试push
git push -u origin master
cd themes/hugo-theme-stack/
git push
设置Github Action
远程新建发布仓库,命名为:username.github.io。这里的username是github的用户名,必须保持一致!
本地源仓库下:
- 设置config.yaml中的baseurl为:https://username.github.io
- 新建文件夹和文件:.github/workflows/deploy-site.yaml,填入如下内容:
name: deploy

on:
    push:
      branches: ["master"]
    workflow_dispatch:
    # schedule:
    #     # Runs everyday at 8:00 AM
    #     - cron: "0 0 * * *"

# Sets permissions of the GITHUB_TOKEN to allow deployment to GitHub Pages
permissions:
  contents: read
  pages: write
  id-token: write

# Allow one concurrent deployment
concurrency:
  group: "pages"
  cancel-in-progress: true

# Default to bash
defaults:
  run:
    shell: bash

jobs:
    # BUild job
    build:
        runs-on: ubuntu-latest
        env:
          HUGO_VERSION: 0.113.0
          TZ: America/Los_Angeles
        steps:
            - name: Checkout
              uses: actions/checkout@v3
              with:
                  submodules: true  # Fetch Hugo themes (true OR recursive)
                  fetch-depth: 0    # Fetch all history for .GitInfo and .Lastmod

            - name: Setup Hugo
              id: pages
              uses: peaceiris/actions-hugo@v2
              with:
                hugo-version: '0.113.0'
                extended: true

            - name: Build Hugo
              env:
                # For maximum backward compatibility with Hugo modules
                HUGO_ENVIRONMENT: production
                HUGO_ENV: production
              run: hugo --minify
            - name: Deploy Web
              id: deployment
              uses: peaceiris/actions-gh-pages@v3
              with:
                  PERSONAL_TOKEN: ${{ secrets.PERSONAL_TOKEN }}
                  EXTERNAL_REPOSITORY: hyrtee/hyrtee.github.io
                  PUBLISH_BRANCH: main
                  PUBLISH_DIR: ./public
                  commit_message: ${{ github.event.head_commit.message }}
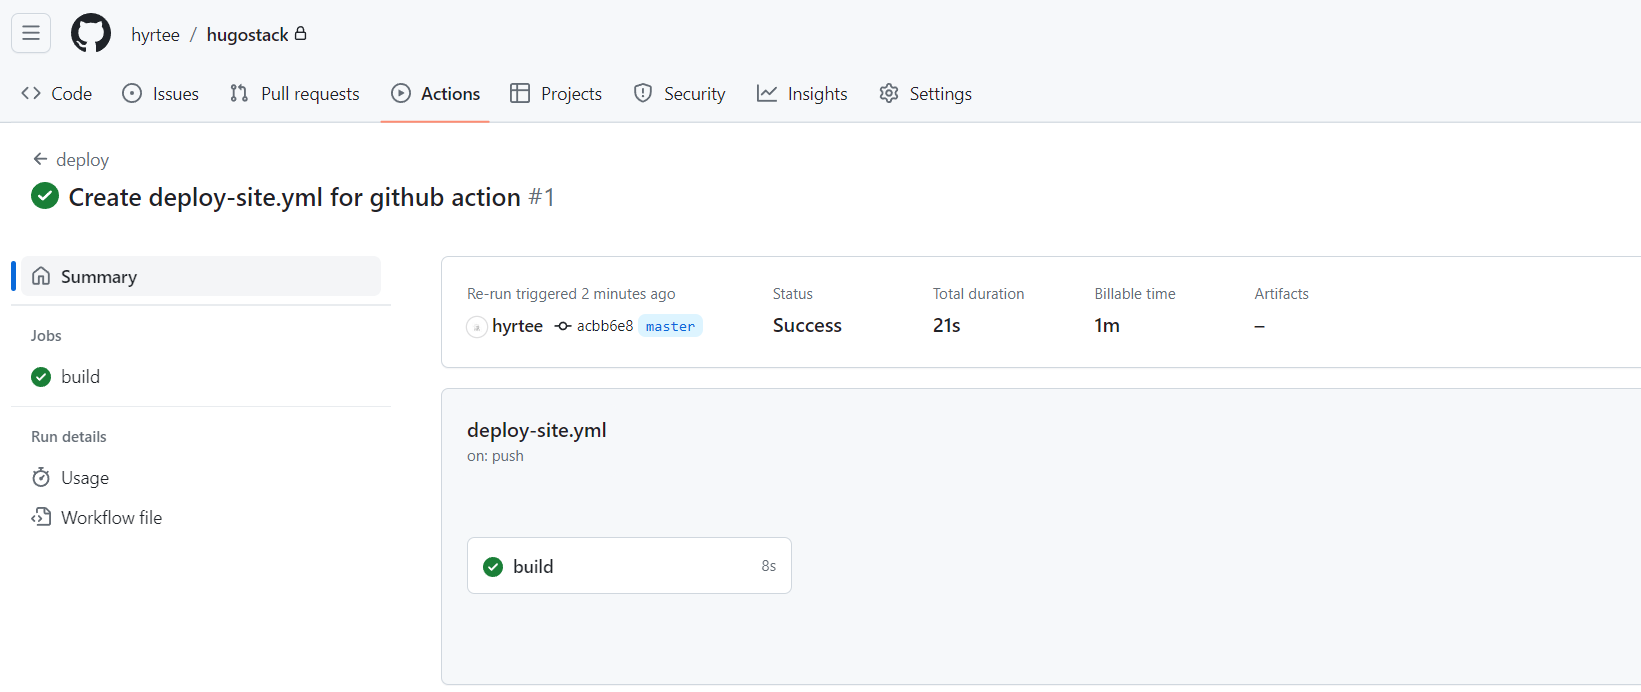
push到远程
bug 3:refusing to allow an OAuth App to create or update workflow .github/workflows/deploy-site.yaml without workflow scope
解决:暂时删除本地的.github/workflows/deploy-site.yaml,包括文件夹,先将其他修改push到远程,随后在github源仓库的Action页面下,新建一个workflows,将上面的deploy-site.yaml内容粘贴到其中。
bug 4:执行Action失败,Action failed with “not found deploy key or tokens”
解决:
新建一个token,enable repo和workflow,复制token。
在源仓库的
Settings - Secrets and variables - Actions中,添加一个secret,将之前新建的token复制其中
Action下rerun之前的job:
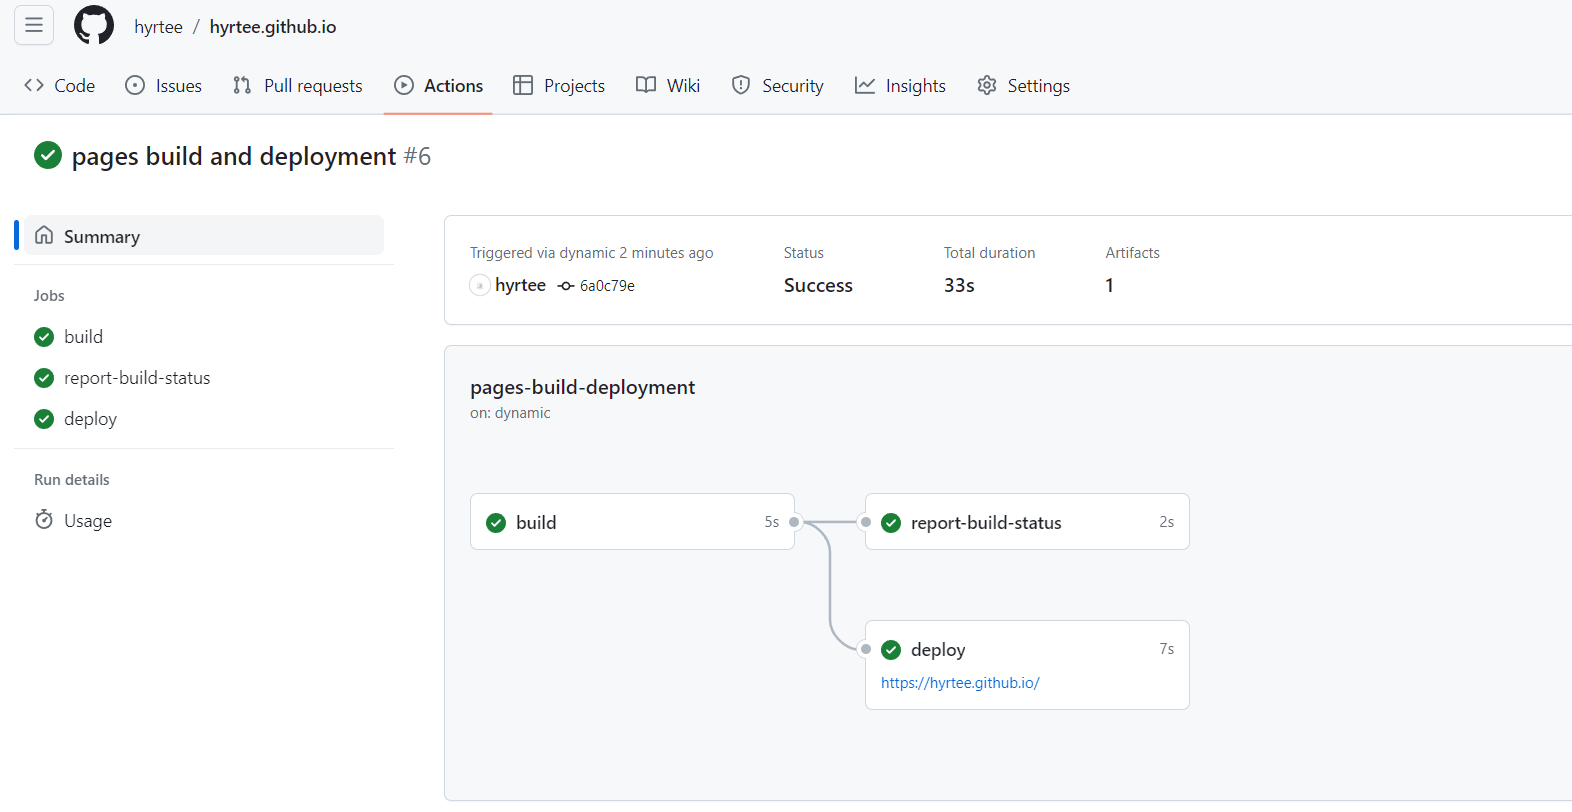
访问https://hyrtee.github.io/,success!
自定义 Blog Style
左侧信息栏
头像
根目录下新建assets/img,添加自己的头像img,随后修改对应config文件的img名称:src
    sidebar:
        emoji: 🍥
        subtitle: MARiA? yyds!
        avatar:
            enabled: true
            local: true
            src: img/avatar.png
社交social
自定义图标,iconfont 下载,颜色#2c3e50,大小24,格式svg。下载后放到assets\icons
social:
        - identifier: github
          name: GitHub
          url: https://github.com/hyrtee
          weight: 1
          params:
              icon: img-name
注意:将下载的img中的svg的所有#2c3e50改成currentColor,否则切换为黑色模式,图标颜色不能自动切换,因为优先使用内部定义的color
文档
Emoji
config中添加如下内容
# Enable global emoji support
enableEmoji: true
随后直接在文章的md文档中添加emoji id即可显示,查询id:emoji-cheat-sheet
Language
如果只想保持一种语言,则config中的language只保留一种语言,如中文:
languages:
    zh-cn:
        languageName: 中文
        weight: 1
评论
使用utterances,操作简单:
- github新建一个评论仓库hyrteeblogtalks
- github安装utterances,并关联上面的评论仓库
- 修改config.yaml
    comments:
        enabled: true
        provider: utterances

        disqusjs:
            shortname:
            apiUrl:
            apiKey:
            admin:
            adminLabel:

        utterances:
            repo: hyrtee/hyrteeblogtalks
            issueTerm: title
            theme: github-light
效果: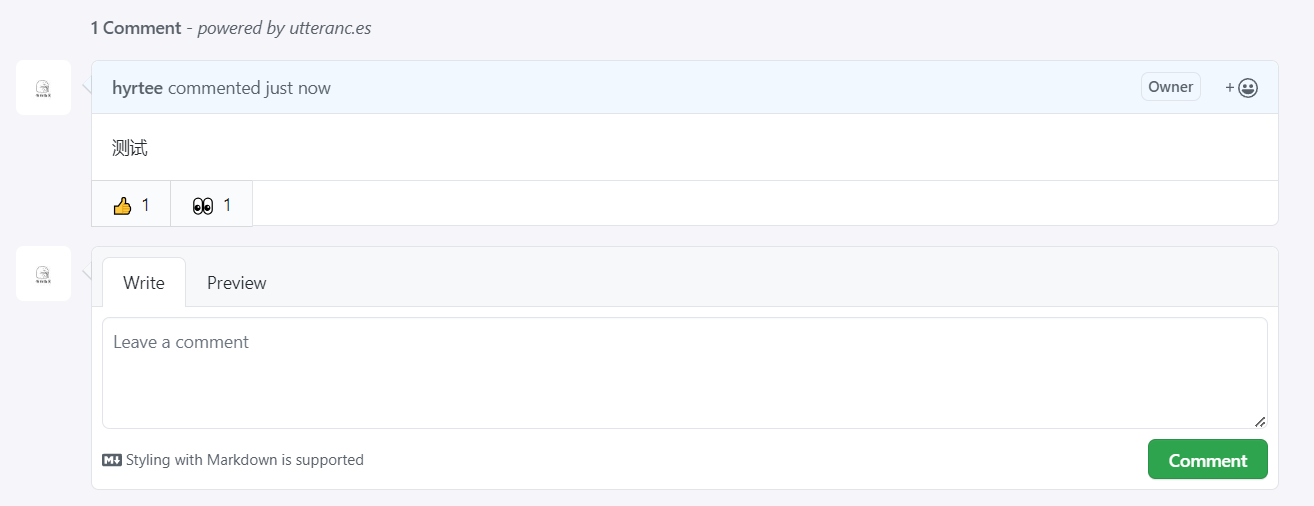
统计分析
使用不蒜子工具,使用简单,只需导入两行代码,官网是这么说的,实际DIY也还行。
导入busuanzi js脚本
在layouts\partials\head\head.html文件末尾:
<!-- busuanzi -->
{{- if .Site.Params.busuanzi.enable -}}
  <script async src="//busuanzi.ibruce.info/busuanzi/2.3/busuanzi.pure.mini.js"></script>
  <meta name="referrer" content="no-referrer-when-downgrade">
{{- end -}}
全局统计
底部显示本站总访问量和访客数,在layouts\partials\footer\footer.html文件:
<section class="copyright">
©
<!-- {{ if and (.Site.Params.footer.since) (ne .Site.Params.footer.since (int (now.Format "2006"))) }}
{{ .Site.Params.footer.since }} -
{{ end }} -->
{{ now.Format "2006" }} <a href="https://stack-theme-mod.vercel.app/">Hyrtee</a><i class="fas fa-bell"></i> ·<i class="fas fa-bell"></i> <a id="days">0</a>Days<br>
{{$var := $scratch.Get "total"}}{{$var = div $var 100.0}}{{$var = math.Ceil $var}}{{$var = div $var 10.0}}共书写了{{$var}}k字·共 {{ len (where .Site.RegularPages "Section" "post") }}篇文章
<!-- 以上是文件原内容,以下是添加部分 -->
<!-- insert busuanzi -->
{{ if .Site.Params.busuanzi.enable -}}
<div class="busuanzi-footer">
<span id="busuanzi_container_site_pv">
本站总访问量<span id="busuanzi_value_site_pv"></span>次
</span>
<span id="busuanzi_container_site_uv">
本站访客数<span id="busuanzi_value_site_uv"></span>人次
</span>
</div>
{{- end -}}
</section>
效果: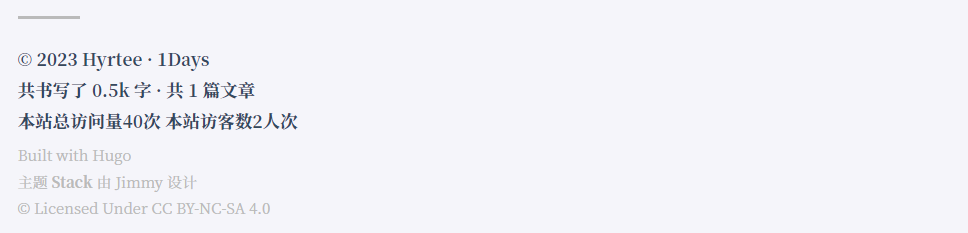
单个文章统计
头部显示文章阅读量,layouts\partials\article\components\details.html文件的footer内结尾:
{{ if .Site.Params.article.readingTime }}
<div>
{{ partial "helper/icon" "clock" }}
<time class="article-words">
{{ .WordCount }}字
</time>
</div>
{{ end }}
<!-- 以上是文件原内容,以下是添加部分 -->
<!-- busuanzi -->
{{ if .Site.Params.busuanzi.enable -}}
<div class="article-analysic"> 
<!-- 这里的read图标,可自行前往iconfont下载 -->
{{ partial "helper/icon" "read" }}
<time class="article-words">
<span id="busuanzi_container_page_pv"><span id="busuanzi_value_page_pv"></span>  阅读</span>
</time>
</div>
{{- end }}
- 原版可能需要在themes/stack/layouts/_default/single.html中修改
- 技巧:无论使用什么版本的stack,默认情况下,单篇文章顶部都会显示字数或需要阅读几分钟,所以vscode搜"字"或"分钟"等关键字,看对应代码在哪个文件,就在哪里添加以上代码,屡试不爽!
效果:
让谷歌&百度搜到我
谷歌
获取谷歌分析ID
首先前往谷歌分析官网,获取Measurement ID,具体操作跟随网站指引即可,名称随意,最终获得一个G-开头的Measurement ID。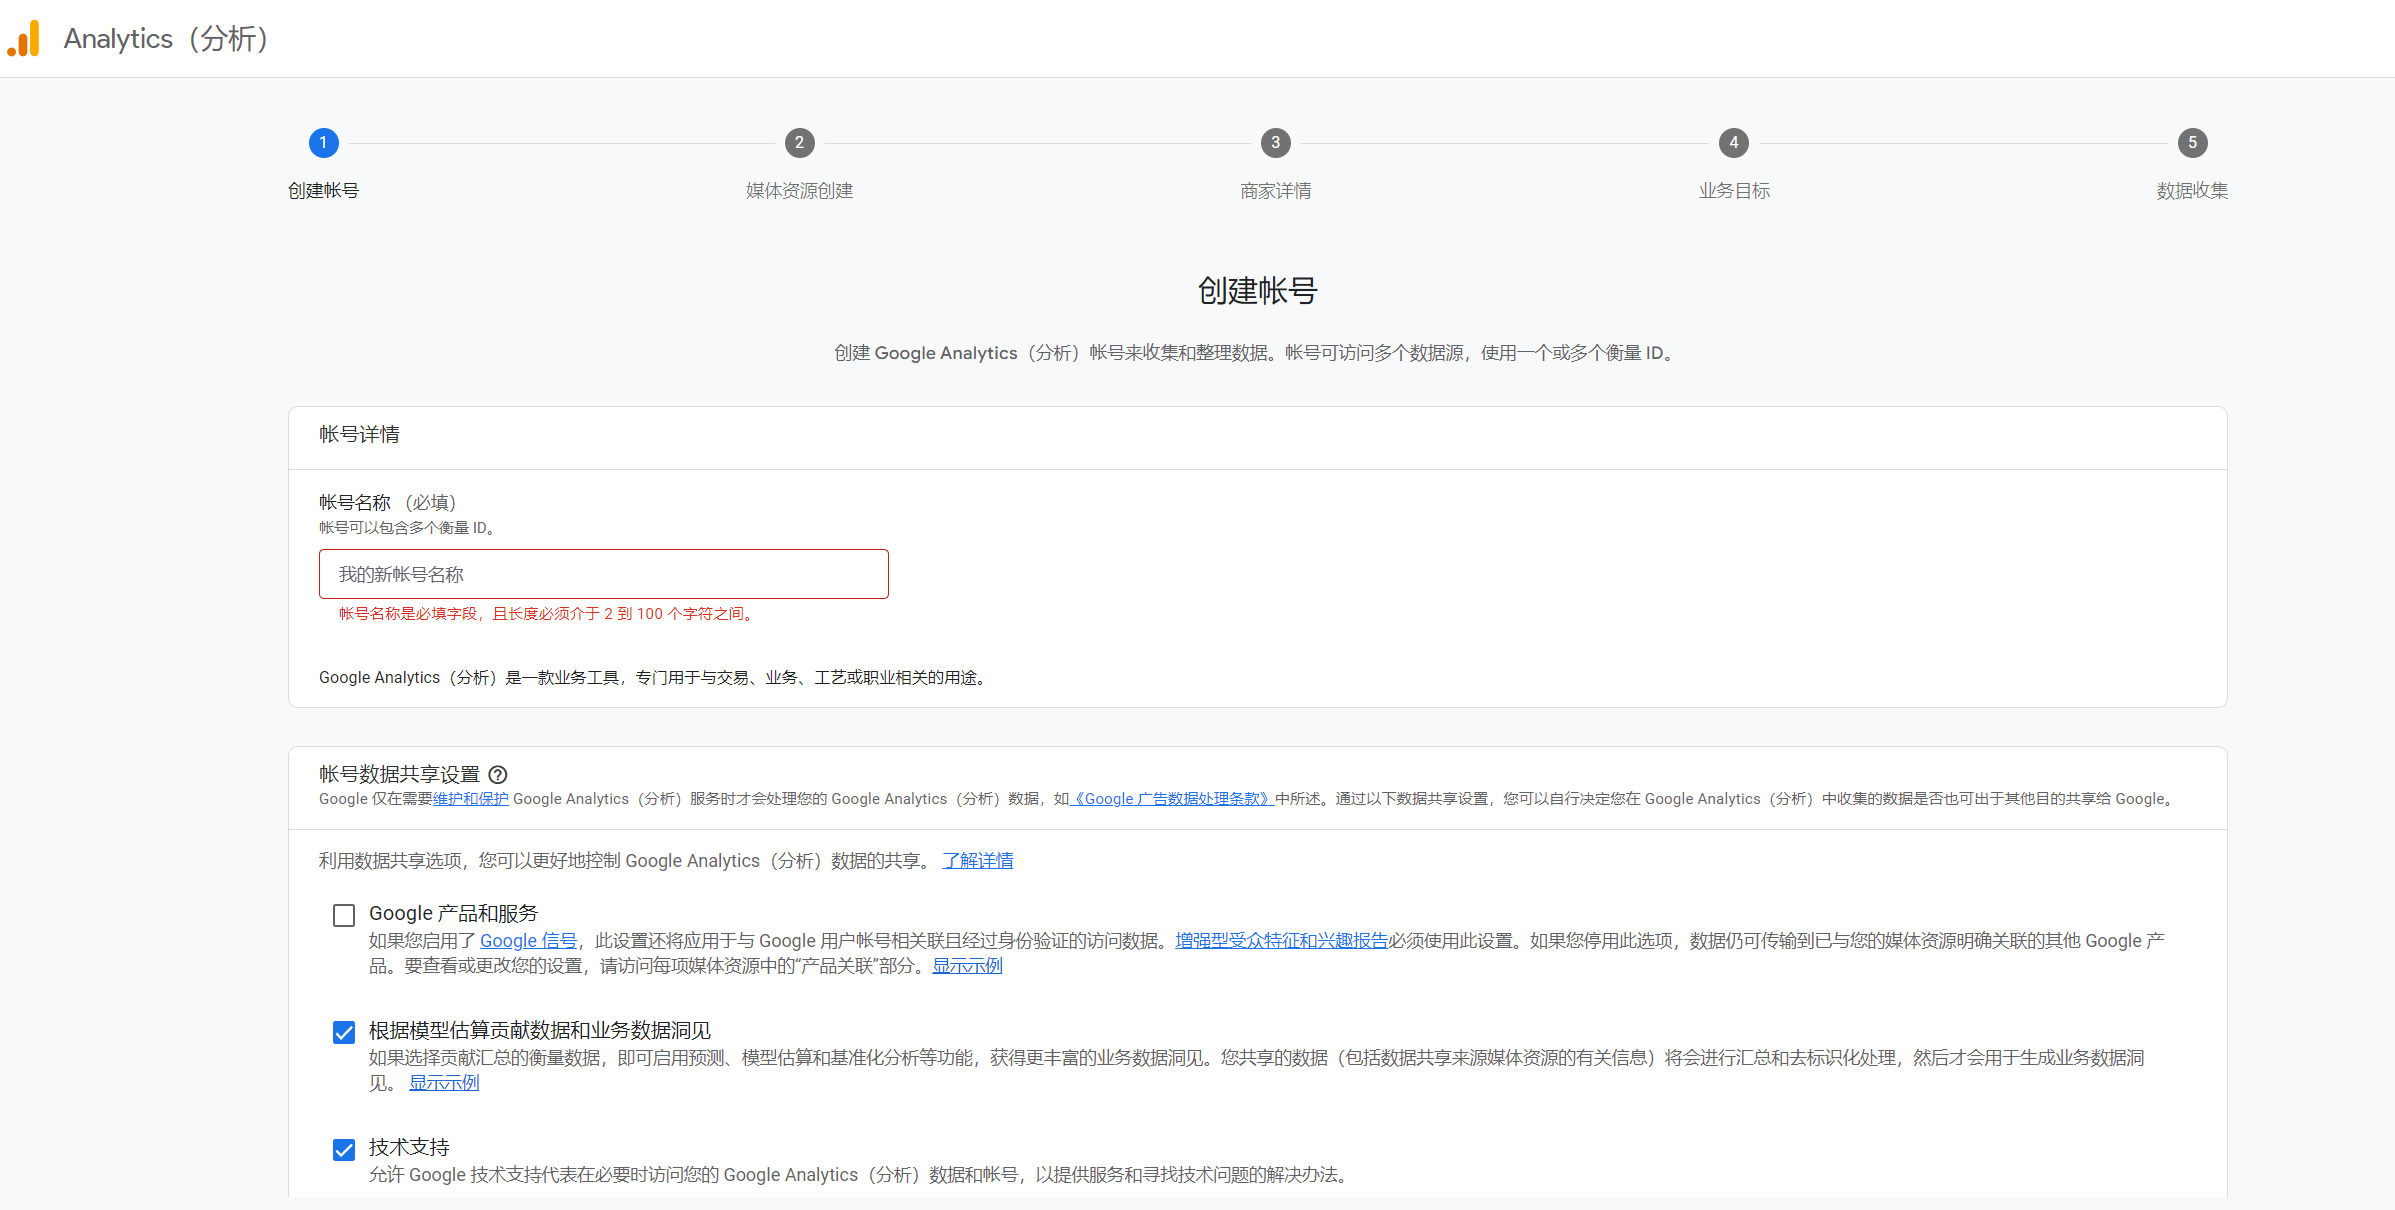
提交站点地图
站点地图(sitemap)一般是一个XML文件,就是告诉搜索引擎,你的网站有哪些页面,让他来爬取你。Hugo会在生成和部署网站时在public文件夹根目录下自动生成sitemap.xml文件。
登录谷歌搜索控制台。在验证所有权的选项中选择“Google Analytics”。
然后点击侧边栏的【站点地图】页面就可以提交我们主页的站点地图URL: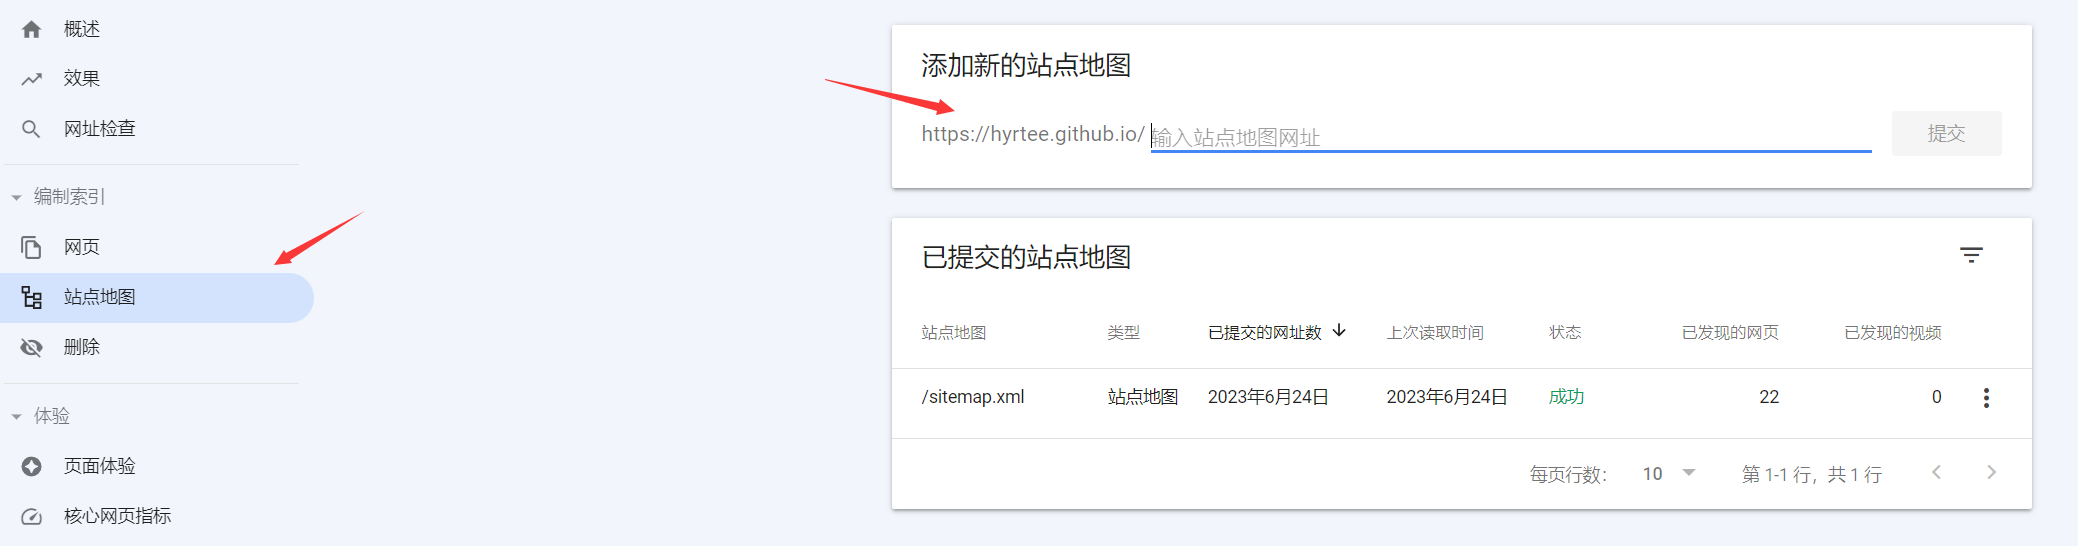
百度
获取js脚本
登陆百度统计主页 ,按照指引,添加网站、获取统计代码。将代码放到themes/hugo-theme-stack/layouts/partials/head/head.html最后,一次性安装,全站皆可被搜索到。如作者:
<script>
var _hmt = _hmt || [];
(function() {
	var hm = document.createElement("script");
	hm.src = "https://hm.baidu.com/hm.js?c376f3e13b35b80fa5d4695e8dd859b1";
	var s = document.getElementsByTagName("script")[0];
	s.parentNode.insertBefore(hm, s);
})();
</script>
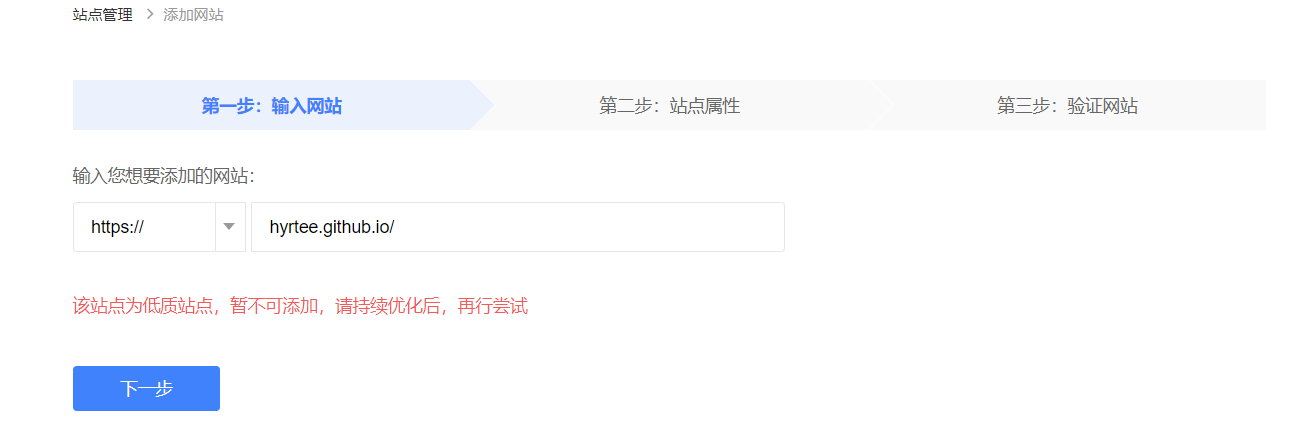
提交站点视图
- 登陆百度搜索资源平台
- 添加站点,下载验证文件,然后把验证文件放在网站public文件夹内。点击“验证”即可。
- 选择左侧菜单→普通收录→sitemap→提交站点地图URL
可能由于博客刚建立,被认为是低质站点,过几天再来看看。。。😭😭😭
使用魔改的stack
偶然发现一个使用stack的博主使用了某位大佬的魔改stack版本,觉得还不错,就升级了一下。相比之前,有以下变化:
- 调整文章页面为三栏显示(代码来自ShadowySpirits)
- 文章按年份分类
- 增加文章字数统计与站点总字数、总篇数显示
- 修改全站字体为思源宋体
- 增加一个引用短代码(短代码来自荷戟独彷徨)
- 添加一个友情链接页面并设置为双栏(友情链接代码来自Bore,双栏代码来自BB_Roin)
- 一系列基于个人美观喜好的CSS修改
- 右侧栏增加Categories小部件
仓库的readme已说明需要修改的点,如头像和底部博客创建天数等。 作者直接替换掉content,按照readme说明修改。
bug 5:小改之后,出现底部部分信息不显示问题:
原版:
魔改版: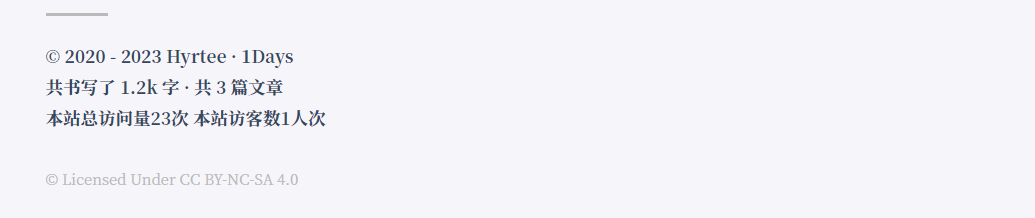
解决:直接替换themes/下的stack为之前的最新版本,若文件夹名称修改,需要同步到config.yaml中开头的theme字段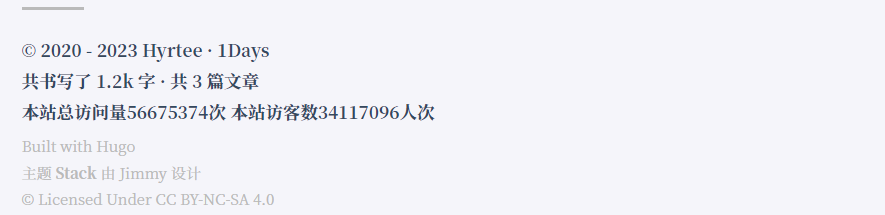
Q&A
运行hugo server -w时, 统计异常
测试时,显示几百万的访问量无碍,正式部署到github pages后,就显示正常了。
refs
如何用 GitHub Pages + Hugo 搭建个人博客
https://blog.reincarnatey.net/2023/build-hugo-blog-with-stack-mod/