在关于栏中可知,作者是个搞嵌入式的,但学习能力实在重要,我更想将其称之为copy能力,工作之后深有体会。可能刚入职还有些自学时间,但大部分时候都没有,需要自己快速上手公司代码,并实现或修改其中某些功能。不需要掌握得多深,能实现,功能正常,测试通过即可。当然,后期会编写很多代码,通过解决很多BUG,期间也会逐渐掌握。
有点跑题了。。。今天学习给博客添加打赏功能。
授人以鱼,不如授人以渔,以下是我这个前后端零基础的解决过程:
在线搜索万能模板
零基础可能有些夸张了哈哈,以前做过一些网页/app/微信小程序。打赏功能,分析下来,应该就是在html或js中添加逻辑代码,在css中添加渲染,由于只涉及到两个图片的展示,甚至连js都不需要,所以这类模板应该不能找。如下就是一份:
功能描述:默认显示一个“打赏”按钮,点开之后,出现微信和支付宝的收款码。
html代码:
<div style="padding: 10px 0; margin: 20px auto; width: 100%; font-size:16px; text-align: center;">
    <button id="rewardButton" disable="enable" onclick="var qr = document.getElementById('QR'); if (qr.style.display === 'none') {qr.style.display='block';} else {qr.style.display='none'}">
        <span>打赏</span></button>
    <div id="QR" style="display: none;">
        <div id="wechat" style="display: inline-block">
            <a class="fancybox" rel="group">
                <img id="wechat_qr" src="https://github.com/hyrtee/hyrtee.github.io/blob/main/reward/alipay.png?raw=true" alt="WeChat Pay"></a>
            <p>微信打赏</p>
        </div>
        <div id="alipay" style="display: inline-block">
            <a class="fancybox" rel="group">
                <img id="alipay_qr" src="https://github.com/hyrtee/hyrtee.github.io/blob/main/reward/alipay.png?raw=true" alt="Alipay"></a>
            <p>支付宝打赏</p>
        </div>
    </div>
</div>
css代码:
#QR {
    padding-top:20px;
}
#QR a {
    border:0
}
#QR img {
    width:180px;
    max-width:100%;
    display:inline-block;
    margin:.8em 2em 0 2em
}
#rewardButton {
    border:1px solid #ccc;
    line-height:36px;
    text-align:center;
    height:36px;
    display:block;
    border-radius:4px;
    -webkit-transition-duration:.4s;
    transition-duration:.4s;
    background-color:#fff;
    color:#999;
    margin:0 auto;
    padding:0 25px
}
#rewardButton:hover {
    color:#f77b83;
    border-color:#f77b83;
    outline-style:none
}
适配Hugo源码,实现打赏功能
作者使用Hugo搭建博客,会更加简单,因为Hugo的项目框架清晰明了,易于查找特定文件。
html
先找到文章页底部的固定标志,比如copyright等。

在博客源码中搜索设置该copyright的html源文件(:如vscode)
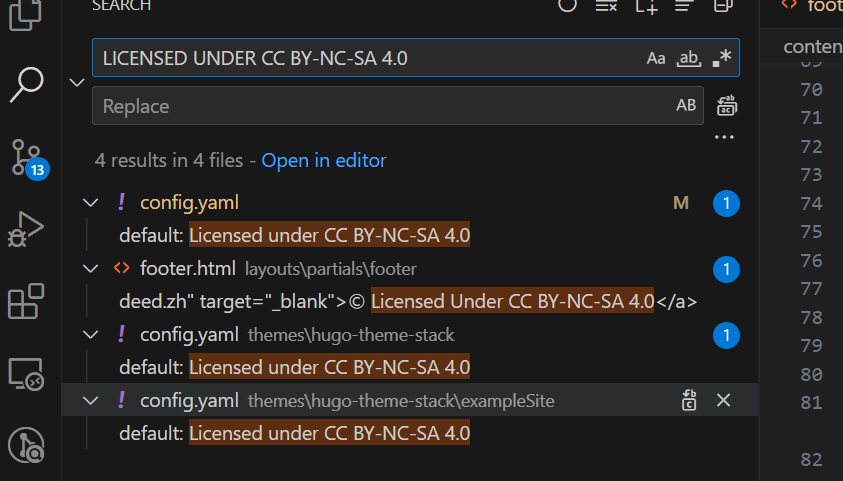
看到搜索结果,实在😂。。。Hugo的好用之处在于,使用config文件进行傻瓜式配置,这里的copyright也是,在config.yaml配置如下:
article:
	math: false
	toc: true
	readingTime: true
	license:
		enabled: true
		default: Licensed under CC BY-NC-SA 4.0
鼬神有句名言:任何事物都有其破绽。此处的破绽就是article、license等关键字,因为处理copyright逻辑的代码,肯定也是根据这些关键字来配置的,比如判断enabled为true,就将default显示在前端上,诸如此类。
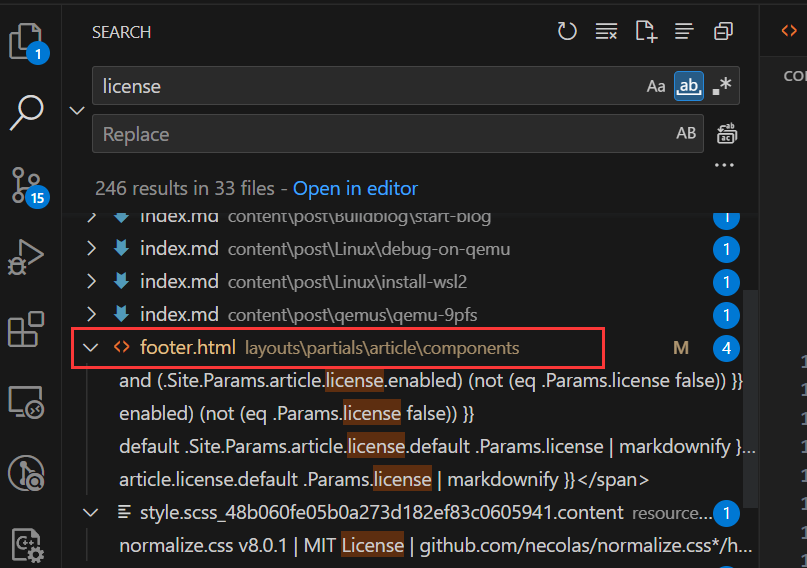
所以继续搜:license
发现这个layouts\partials\article\components\footer.html文件很可疑,很像处理copyright的html代码:
{{ if and (.Site.Params.article.license.enabled) (not (eq .Params.license false)) }}
<section class="article-copyright">
	{{ partial "helper/icon" "copyright" }}
	<span>{{ default .Site.Params.article.license.default .Params.license | markdownify }}</span>
</section>
{{ end }}
也有对enabled关键字的判断,所以将上面万能模板中的html代码,放到 < footer > 内的底部:
<footer class="article-footer">
    {{ partial "article/components/tags" . }}

    {{ if and (.Site.Params.article.license.enabled) (not (eq .Params.license false)) }}
    <section class="article-copyright">
        {{ partial "helper/icon" "copyright" }}
        <span>{{ default .Site.Params.article.license.default .Params.license | markdownify }}</span>
    </section>
    {{ end }}

    {{- if ne .Lastmod .Date -}}
    <section class="article-lastmod">
        {{ partial "helper/icon" "clock" }}
        <span>
            {{ T "article.lastUpdatedOn" }} {{ .Lastmod.Format ( or .Site.Params.dateFormat.lastUpdated "Jan 02, 2006 15:04 MST" ) }}
        </span>
    </section>
    {{- end -}}

	<!-- 以下是新增的打赏代码 -->
	<div style="padding: 10px 0; margin: 20px auto; width: 100%; font-size:16px; text-align: center;">
		<button id="rewardButton" disable="enable" onclick="var qr = document.getElementById('QR'); if (qr.style.display === 'none') {qr.style.display='block';} else {qr.style.display='none'}">
			<span>打赏</span></button>
		<div id="QR" style="display: none;">
			<div id="wechat" style="display: inline-block">
				<a class="fancybox" rel="group">
					<img id="wechat_qr" src="https://github.com/hyrtee/hyrtee.github.io/blob/main/reward/alipay.png?raw=true" alt="WeChat Pay"></a>
				<p>微信打赏</p>
			</div>
			<div id="alipay" style="display: inline-block">
				<a class="fancybox" rel="group">
					<img id="alipay_qr" src="https://github.com/hyrtee/hyrtee.github.io/blob/main/reward/alipay.png?raw=true" alt="Alipay"></a>
				<p>支付宝打赏</p>
			</div>
		</div>
	</div>
</footer>
更新收款码src
特地用一小节来提醒: 更新收款码,更新收款码,更新收款码,别傻傻转到作者口袋里了。
css
上面copyright的html代码中,有几个class,应该就是定义在对应的css文件中了,继续搜索,如:article-copyright
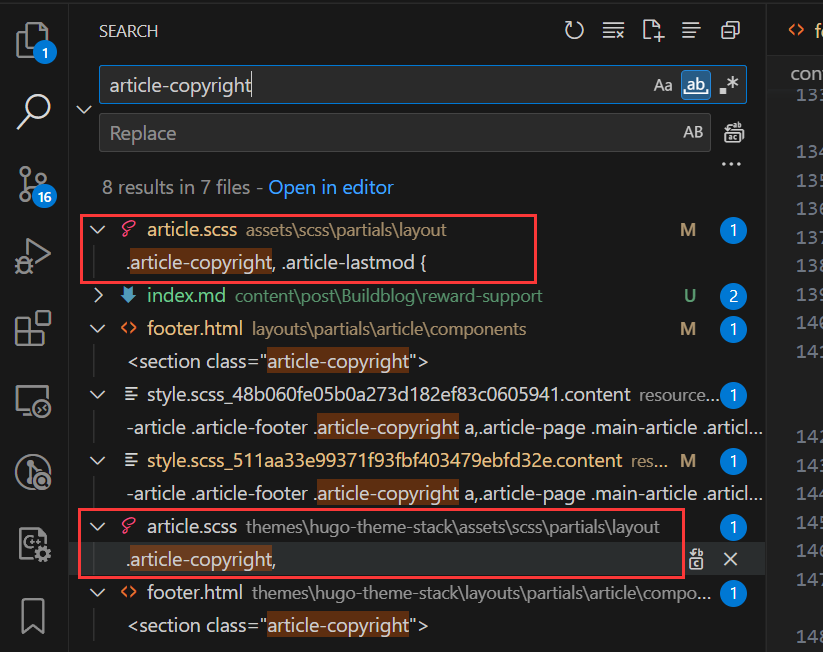
搜索结果中,有俩,看第一个就行,第二个是theme模板中的,没用上。
添加到.article-copyright的下方:
.article-footer {
	margin: var(--card-padding);
	margin-top: 0;

	section:not(:first-child) {
		margin-top: var(--card-padding);
	}

	section {
		color: var(--card-text-color-tertiary);
		text-transform: uppercase;
		display: flex;
		align-items: center;
		font-size: 1.4rem;

		svg {
			width: 20px;
			height: 20px;
			margin-right: 15px;
			stroke-width: 1.33;
		}
	}

	.article-tags {
		flex-wrap: wrap;
		text-transform: unset;
	}

	.article-copyright, .article-lastmod {
		a {
			color: var(--body-text-color);
		}
	}
	/* 以下是新增的打赏代码 */
	#QR {
		padding-top:20px;
	}
	#QR a {
		border:0
	}
	#QR img {
		width:180px;
		max-width:100%;
		display:inline-block;
		margin:.8em 2em 0 2em
	}
	#rewardButton {
		border:1px solid #ccc;
		line-height:36px;
		text-align:center;
		height:36px;
		display:block;
		border-radius:4px;
		-webkit-transition-duration:.4s;
		transition-duration:.4s;
		background-color:#ffffff;
		color:#292929;
		margin:0 auto;
		padding:0 25px
	}
	#rewardButton:hover {
		color:#f77b83;
		border-color:#f77b83;
		outline-style:none
	}
}
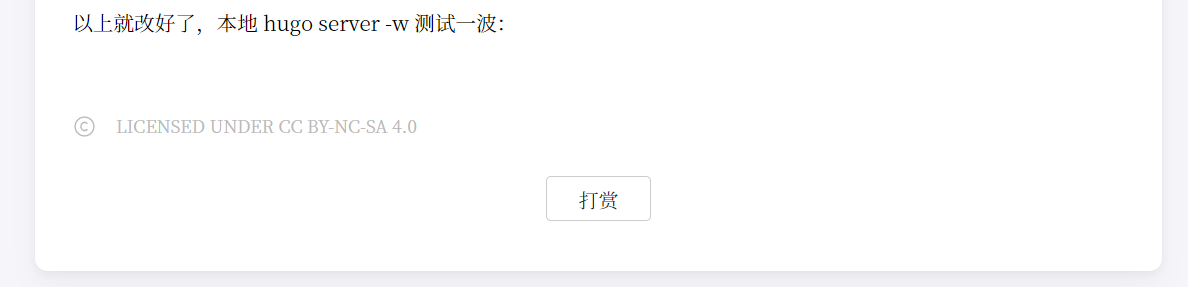
以上就改好了,本地 hugo server -w 测试一波:
初始
点击后

想和Hugo的config一样,轻松配置收款码图片吗?那就继续👇
config灵活配置
找个现成的config例子,仿照改写。
头像就蛮不错的:
sidebar:
	emoji: 🍥
	subtitle: MARiA? yyds!
	avatar:
		enabled: true
		local: true
		src: img/head1.jpeg
自定义 config
根据上面的avatar config,自定义一份reward的config
reward:
        enabled: true
        wechat_src: reward/wechatpay.png
        alipay_src: reward/alipay.png
收款码图片需要同步到项目下的assets/reward目录
自定义 html 逻辑
和上面如出一辙,搜索avatar,找到对应html文件layouts\partials\sidebar\left.html
{{ with .Site.Params.sidebar.avatar }}
	{{ if (default true .enabled) }}
	<figure class="site-avatar">
		<a href="{{ .Site.BaseURL | relLangURL }}">
		{{ if not .local }}
			<img src="{{ .src }}" width="300" height="300" class="site-logo" loading="lazy" alt="Avatar">
		{{ else }}
			{{ $avatar := resources.Get (.src) }}

			{{ if $avatar }}
				{{ $avatarResized := $avatar.Resize "300x" }}
				<img src="{{ $avatarResized.RelPermalink }}" width="{{ $avatarResized.Width }}"
					height="{{ $avatarResized.Height }}" class="site-logo" loading="lazy" alt="Avatar">
			{{ else }}
				{{ errorf "Failed loading avatar from %q" . }}
			{{ end }}
		{{ end }}
		</a>
		{{ with $.Site.Params.sidebar.emoji }}
			<span class="emoji">{{ . }}</span>
		{{ end }}
	</figure>
	{{ end }}
{{ end }}
仿写过程就不细讲了,可以作为一个锻炼自己的过程。以下是仿写好的打赏代码:
{{ with .Site.Params.reward }}
	{{ if (default true .enabled) }}
		{{ $wechat := resources.Get (.wechat_src) }}
		{{ $alipay := resources.Get (.alipay_src) }}
			<div style="padding: 10px 0; margin: 20px auto; width: 100%; font-size:16px; text-align: center;">
				<button id="rewardButton" disable="enable" onclick="var qr = document.getElementById('QR'); if (qr.style.display === 'none') {qr.style.display='block';} else {qr.style.display='none'}">
					<span>打赏</span></button>
				<div id="QR" style="display: none;">
					{{ if $wechat }}
						<div id="wechat" style="display: inline-block">
							<a class="fancybox" rel="group">
								<img id="wechat_qr" src="{{ $wechat.RelPermalink }}" alt="WeChat Pay"></a>
							<p>微信</p>
						</div>
					{{ else }}
						{{ errorf "Failed loading reward wechat img from %q" . }}
					{{ end }}
					{{ if $alipay }}
						<div id="alipay" style="display: inline-block">
							<a class="fancybox" rel="group">
								<img id="alipay_qr" src="{{ $alipay.RelPermalink }}" alt="Alipay"></a>
							<p>支付宝</p>
						</div>
					{{ else }}
						{{ errorf "Failed loading reward alipay img from %q" . }}
					{{ end }}
				</div>
			</div>
	{{ end }}
{{ end }}
将其替换到layouts\partials\article\components\footer.html相应位置即可。
实际效果,和初版的一致。